Toolbar
JEditor's toolbar is fully customizable: it's possible to select what tools appear on it and configure their order.
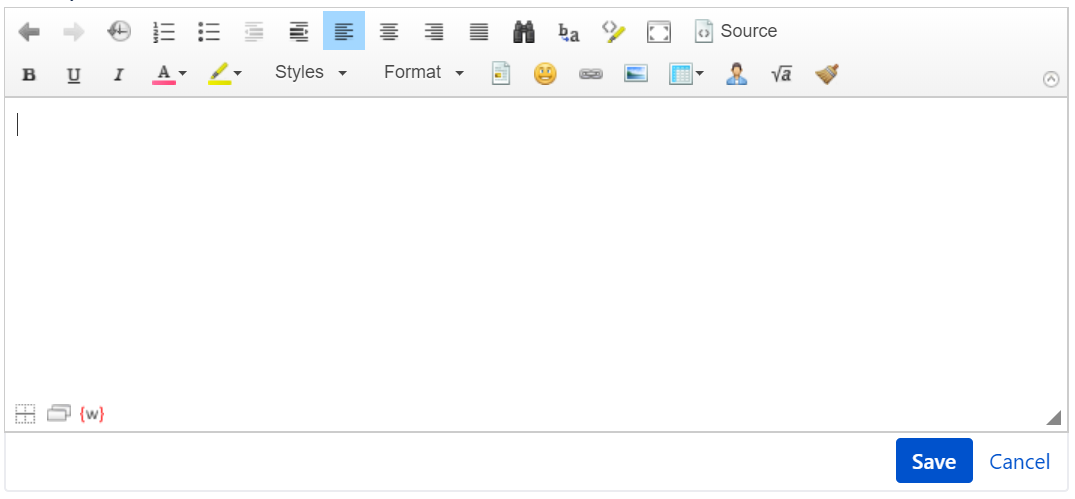
This is the default configuration of the toolbar:
You can add or remove tools in JEditor Configuration > Toolbar:
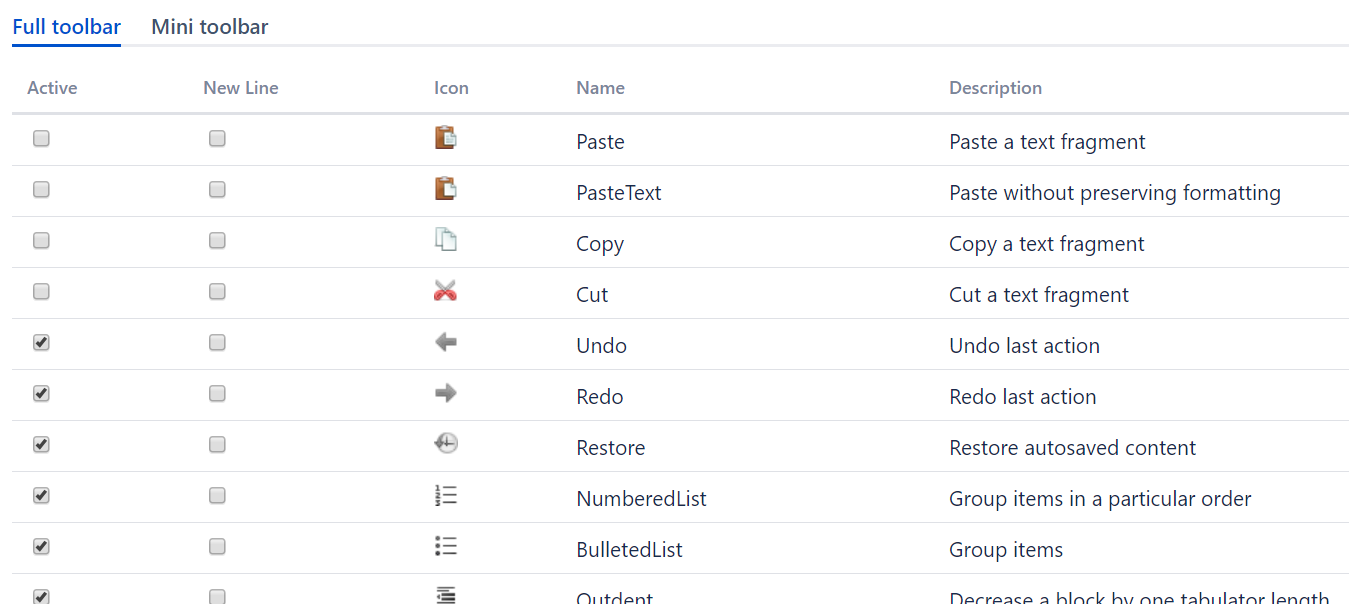
To add or remove a tool select/deselect the corresponding checkbox in the Active column.
Selecting a checkbox in the New Line column will create a new line after this tool.
You can also drag and drop lines to change the order in which tools appear on the Toolbar. They appear on the toolbar in the same order as you see them in the configuration table (left to right, until a new line or end of the toolbar).
Note: all changes made in JEditor Configuration > Toolbar are saved instantly.
JEditor's toolbar can only be configured by a Jira administrator. Users cannot change the layout of tools. Users can collapse the toolbar using the collapse button (located in the bottom-right corner of the toolbar) or switch between two pre-configured toolbars (see more on the switch option below, in the bottom bar section).
When the toolbar collapses, the first row of tools remains visible. This allows to visually reduce the size of the toolbar. This may be helpful when the toolbar contains several rows of tools. The toolbar will remember its state:
Bottom bar
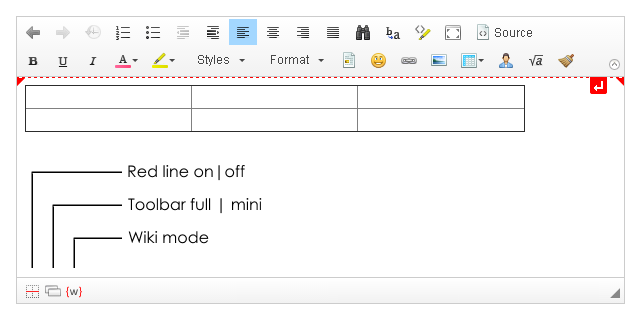
JEditor's bottom bar consists of only three tools:
- The Red Line button - a red line that appears when you move a mouse cursor to a place where it's impossible to add a new line without using Source mode (like between two tables or panels). If you click on it, JEditor will create an empty line.
- The Switch Toolbar button - in JEditor Configuration > Toolbar, it's possible to configure two separate toolbars (Full toolbar and Mini toolbar). Users can switch between these toolbars when the button is active/enabled. Initially, the idea behind this was to let users switch between a single-line toolbar with minimum tools and a multi-line toolbar with all required tools (hence the names of the toolbars). After adding a stateful collapse button, this use case became obsolete, but we decided to keep the feature.
- The Wiki Mode button - after clicking this button, JEditor will switch into the wiki mode. In this mode, JEditor will display either a wiki text editor or Jira RTE (depending on Jira version and configuration). JEditor will remember the state of this button (only for that particular field and only for the user who clicked the button). Users can switch back to normal JEditor interface by clicking the JEditor button.
To enable these tools you need to enable the corresponding options in JEditor Configuration > Settings:

0 Comments